Ah, royal icing: It’s the secret to the most gorgeous cookies you’ve ever seen—ones that can cost upwards of $14 a pop, depending on how large and detailed they are—and it can also be the most infuriating frosting to work with. Even learning how to make royal icing can be head-scratching (Do you use egg whites, corn syrup or neither? What consistency should I look for? What does ‘flooding’ even mean?!). Fear not—we’ll break down the techniques for making royal icing, as well as share our corn syrup- and egg white-free recipe, so you can level up your dessert game without losing your mind in the process.
How to Make Royal Icing (the Foolproof Way)

•
Published Aug 18, 2023
PureWow editors select every item that appears on this page, and some items may be gifted to us. Additionally, PureWow may earn compensation through affiliate links within the story. All prices are accurate upon date of publish. You can learn more about the affiliate process here.

Candace Davison
What Is Royal Icing?
Unlike traditional frostings, royal icing has a more liquid-like consistency and dries to a hardened state, almost like candy. It’s key for creating detailed designs on sugar and shortbread cookies, since it dries smoothly and can be layered with more royal icing or drawn on with edible ink.
Each batch can be adjusted to one of three main consistencies:
- Royal icing for “flooding” cookies — This is the runniest icing, which is pancake batter-like in consistency and is used for filling in cookies once you’ve outlined them with a medium-stiffness icing.
- Medium-stiffness or detail royal icing — This is more toothpaste-like; it’s thicker and is used for outlining the cookies, writing words or adding fine details
- Stiff royal icing — This is used when you want to give a treat dimension and texture, like adding leaves or rosettes that’d hold a specific shape. It doesn’t dry as smoothly as the other types of royal icing, and when you dip a spatula into it, you’ll find it leaves a stiff peak behind, much like a meringue.
Candace Davison
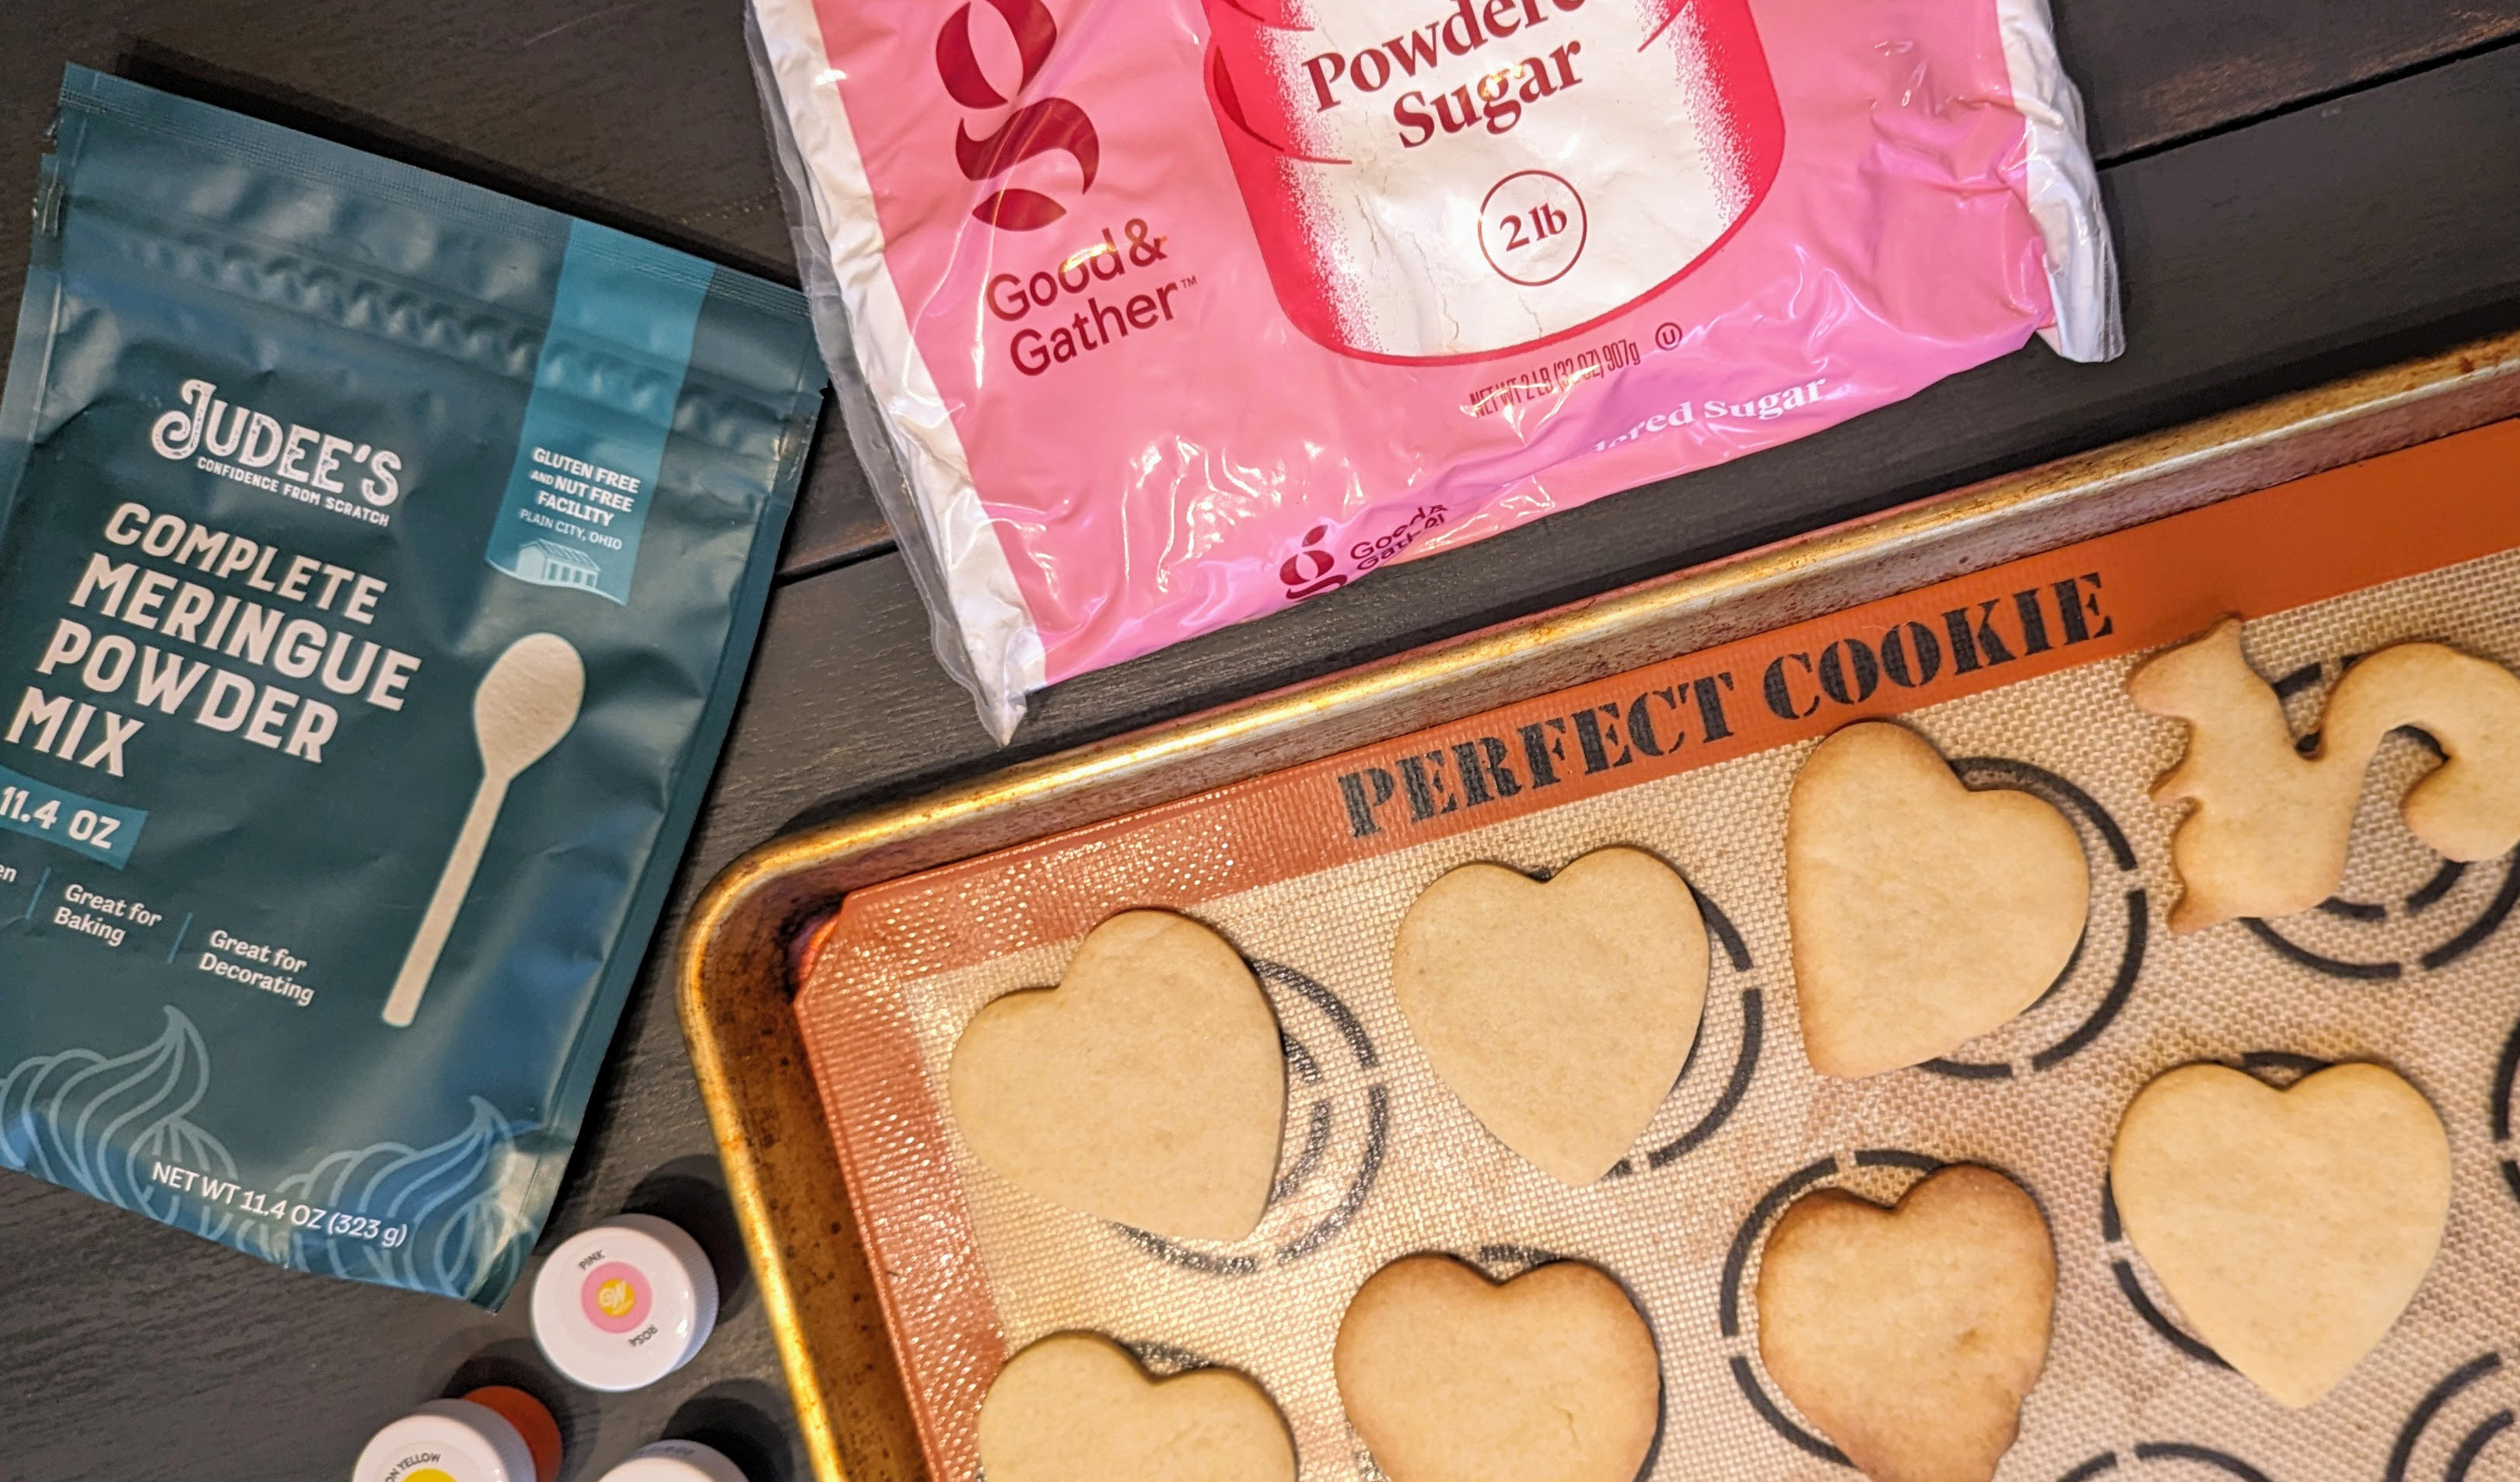
What Do You Need to Make Royal Icing?
How you make it is where things differ. To some, royal icing is always made with pasteurized egg whites, but meringue powder is a popular alternative, and it’s so easy to use, it’s become our preferred method. (Some recipes call for corn syrup to make the frosting a bit softer and shinier, but we’ve found you don’t need it.)
Here’s What You’ll Need for a Meringue-Based Royal Icing:
- Meringue powder
- Warm water
- Confectioners sugar
- Gel food coloring
- Measuring cups and spoons
- Stand mixer or mixing bowl with hand mixer
- Silicone spatula
- Piping bags
- Round piping tips (we like the Wilton No. 2 and 3 sizes for a more precise application)
- Baked and cooled sugar cookies, for decorating
How to Make Royal Icing, Step by Step:
Ingredients:
- 3 tablespoons meringue powder
- ½ cup water, room temperature or slightly warmer
- 6 cups confectioners sugar
- Gel food coloring of your choice
Directions:
1. In a small bowl, combine meringue powder and water, whisking until no lumps remain.
2. Pour into the bowl of a stand mixer (or use a large mixing bowl and hand mixer). Add in 3 1/2 cups of confectioners sugar and mix on the lowest setting, for about 3 to 4 minutes. You want to add as little air as possible here, because air bubbles will result in a crackly, less smooth icing.

THE 10-SECOND RULE FOR CHECKING ROYAL ICING CONSISTENCY / PHOTO: CANDACE DAVISON
3. Make the Flooding Icing First, Using the 10-Second Rule: Lift the beater out of the icing and let the icing drizzle back into the bowl. It’ll slowly sink back into the rest of the icing, and ideally, this should take about 10 seconds. If it’s any less, it’ll be too runny, and you should add a teaspoon or so of confectioners sugar, mixing for another minute or so, and test again. If it’s too thick, add a ¼ teaspoon of water, mix for a minute, and test until you hit roughly 10 seconds. (If it lasts 7 to 8 seconds, that’s typically fine though, so don’t drive yourself bonkers trying to hit 10 exactly.)
4. Remove about two-thirds of the icing, placing it in a separate bowl and setting it aside for now. It will be used as your flooding icing. (Pro tip: Cover the surface with plastic wrap so it doesn’t start to harden.)
5. Make the Piping Icing, Following the 15-Second-Ish Rule: For the remaining icing, add a tablespoon of confectioners sugar and mix for a minute. Pull out the beater, letting icing drizzle back into the bowl. It should take closer to 12 to 15 seconds to sink from the surface back into the rest of the icing.
6. Here’s where you’ll want to do some frosting math: How many colors will you need for your cookie’s design? Separate your piping and flooding frosting into bowls, based on how many colors you’ll need for each. Add a few drops of food coloring to each one, stirring to combine, gradually adding more until you have the color you’d like.
7. Pour into piping bags. Use the piping frosting to outline your cookie, then the flooding icing to fill it in. Use a toothpick to pop any air bubbles that appear in the frosting, then set them aside to dry for at least six hours.

Candace Davison
Pro Tip: Want to get really fancy with your designs? If you have a mini projector, you can project the outline of an image onto the cookie to create more detailed designs. Or you can use an edible ink marker to draw the details you like, then trace them with a piping bag.
Additional Royal Icing FAQ’s
How Long Does Royal Icing Need to Sit?
In our experience—and based on every expert’s advice we’ve gotten—you’ll need at least six hours for the icing to properly dry. Many pros suggest giving it 12 to 24 hours. Perfection takes time.
What’s the Best Way to Store Royal Icing?
Store meringue-based royal icing in an airtight container at room temperature, the baking pros at Wilton recommend.
How Long Does Royal Icing Last?
Royal icing will last two weeks when stored properly, according to Wilton—just make sure that when you’re ready to use it, you pop it into a stand mixer (or use a mixing bowl and hand mixer) to whip it back up to the consistency you want. (If you use an egg white-based royal icing, it will last two days, or up to five if refrigerated, the recipe developers at the Martha Stewart Test Kitchen say.)