We’ve spent countless hours tracking down and testing the perfect white tees. We have a drawer full of wearable souvenirs from concerts, Thanksgiving 5Ks and sorority semiformals. They’re a crucial part of our easy weekend wardrobe (and sometimes we even wear them to the office). We just can’t imagine our lives without T-shirts. And yet, do we really need to hold on to all those ratty, sweat-stained, ill-fitting tees? Probably not. Here are 11 creative ways to deal with the stack of old T-shirts that are currently sitting in the back of your closet.
Wondering What to Do with Your Old T-Shirts? Here Are 11 Creative Ideas
•
Published Dec 9, 2019
First Things First, Don’t Throw Them In The Trash!
You might look at a stained, torn old tee and think, The best place for this is in the bin. Even though they may truly look like trash, this is probably the worst thing you can do! According to a report by Newsweek, New York City alone spends $20.6 million annually to transport textile waste to landfills. Once in a landfill, these materials begin to slowly decompose while releasing a slew of toxic gases, including carbon dioxide and methane, both of which are greenhouse gases. Yup, that all contributes to global warming. According to a 2017 State of Reuse Report lead by global thrift retailer Savers, about 26 billion pounds of clothing end up in landfills each year in North America. That’s a lot of old sleep shirts contributing to climate change. So as tempting as it might be, step away from the garbage can and choose one of these eco-friendly (and inventive!) options below.
Sveti/Getty Images
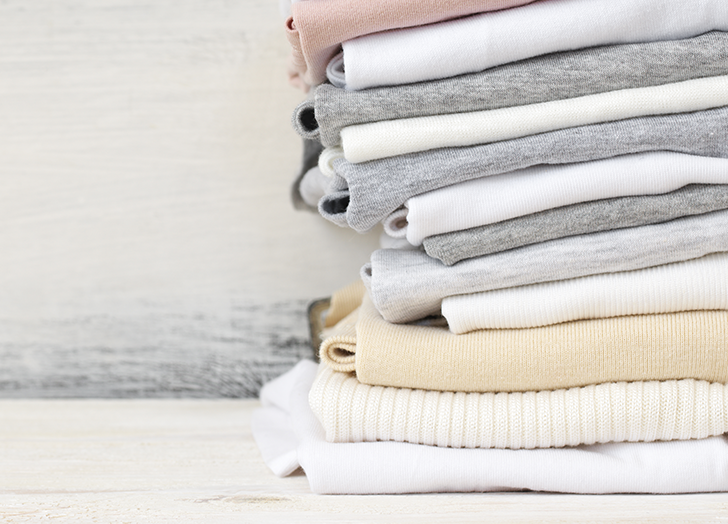
1. Donate Them
If you’re getting rid of clothing because you’re just not that into it anymore or it just doesn’t fit quite right, consider donating it to someone who could still get some use out of it. Or, if it’s in really good condition and from a brand you think might have some resale value (like J.Crew’s collectible graphic tees or one from a designer label), you can also look into selling it at a consignment store or through an online resale destination like Poshmark or ThredUp.
If you want to go the donation route rather than consigning, a quick Google search will help you find a number of clothing collection boxes in your neighborhood, but there are also plenty of national charities you can consider, like Clothes4Souls and Planet Aid. You can also make a request through ThredUp for a prepaid donation bag or printable label to use on your own box. Simply pack up your old tees and ship them off (for free) to ThredUp, which will then make a monetary donation on your behalf to one of three charities it’s currently partnered with—Help a Mother Out, Girls Inc. and Feeding America—and either resell or recycle them, depending on their state of wear. Of course, there’s also Goodwill, GreenDrop and the Salvation Army, all of which have drop-off locations nationwide. Visit their websites for more details, including information on how to mail your donations.

AzmanL/Getty Images
2. Recycle Them
If your tees have truly lived their lives to the fullest and are beyond repair, you can—and should—consider recycling them. In an effort to offset their carbon footprints, a lot of fast-fashion brands, like H&M and American Eagle Outfitters, have in-store recycling programs that accept more than just old tees; you can also drop off textiles including sheets, towels and those canvas tote bags that seem to multiply in your hall closet. The North Face, Patagonia and Levi’s also have donation programs in place that offer incentives for shoppers to recycle. In fact, each of the aforementioned companies will give you a discount to use on future purchases as a thank-you for your green efforts.
There’s also Secondary Materials and Recycled Textiles, or SMART, a company that has a recycling drop-off location finder. As tempting as it might be to toss your ratty tees in the trash, it’s just as easy to toss them in a donation bin as you’re walking into the grocery store or just before your Sunday-morning yoga sesh—and it’s infinitely better for the planet.
Maskot/Getty Images
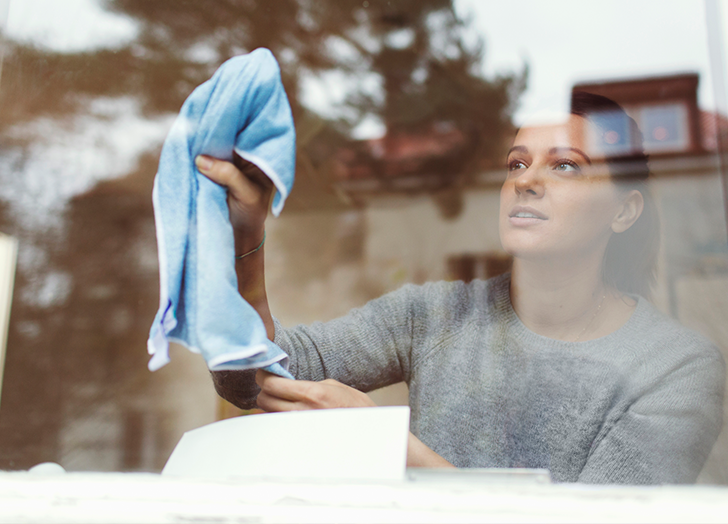
3. Use Them As Rags
Whether you’re cleaning the bathroom or scrubbing moldy outdoor furniture, sometimes a good old-fashioned rag is the only thing that can get the job done. Because really, who wants to use their pretty washcloths or beach towels to rub dirt, oil and grime off the bike you’ve been stowing in your garage all winter long? Cut along the seams of your T-shirt to separate the front from the back to create two rough-and-ready rags to get those gross but necessary jobs done. Once they’ve reached the point where the former tees are truly disintegrating in front of your eyes, just pay a visit to your local recycling center to ensure they don’t end up in a landfill.
Warner Bros.
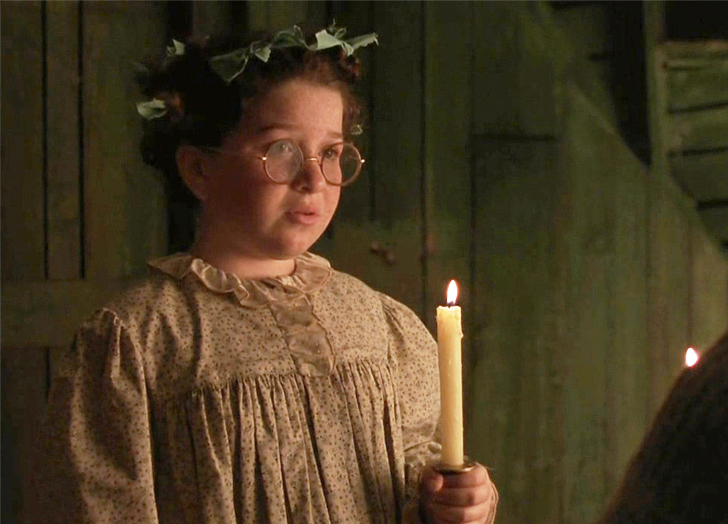
4. Use Them As Hair Curlers
Rag curls are a very eco-friendly and super-easy way to curl your hair. Basically, you just wrap your hair around small cloth strips, tie them into place and then hit the hay. When you wake up in the morning, you’ll have beautiful, bouncing curls. This curling technique has been around forever; in fact, your grandmother, mom or aunt may have relied on it back in the day. And you may have seen actresses with their hair full of rags in movies like A Little Princess.
Here’s a step-by-step breakdown of how to get the look:
Step 1: Cut your T-shirt into strips about five inches in length and one to two inches wide. (You might want to make them larger if you have particularly thick hair.)
Step 2: Start with hair that’s about 90 percent dry. You can spritz your strands or run a wet brush through them if necessary. Separate a one-inch section of hair at the front of your head and begin wrapping your hair around the center of the cloth strip.
Step 3: Continue rolling and wrapping until you reach your scalp. Tie the ends of the rag together, keeping the rolled hair in the middle, to secure it in place.
Step 4: Keep separating your hair into one-inch sections, wrapping and tying until all your hair has been knotted up with the strips of old T-shirt.
Step 5: Let your hair air-dry before heading to bed or use a diffuser to set the curls in place.
Step 6: Once your hair is 100 percent dry (and cool, if you go the diffuser route), unknot the cloth strips and slip them out of your hair to reveal gorgeous curls.
You can also check out this quick tutorial from brittanilouise for more information. One thing to note: This technique typically renders fairly tight barrel curls, but all you need to do is lightly brush them out and let them fall a bit before you head out for the day and you should be all set.

Braun5/Getty Images
5. Use Them As Garden Ties
If you’re not really into the idea of tying dingy strips of fabric into your nice, clean hair (we get it), perhaps you’d rather turn your T-shirt into garden ties. You can use those same strips in place of plastic ties to keep your tomato plants growing tall. They can also come in handy for guiding vines and other crawlers up a trellis, to encourage growth in a specific direction (you know, for when your ZZ plant feels compelled to go horizontal instead of vertical) or to support growing trees.
Melissa Ross/Getty Images
6. Use Them As Paint Smocks For Kids
Let your kiddos play with acrylics, watercolors and paint pens without fear of staining their school or play clothes. The same goes for adults, for that matter. Save a few old T-shirts to wear while painting your sister’s new nursery, staining a vintage coffee table or working in the garden (with your eco-friendly garden ties in tow, obviously).
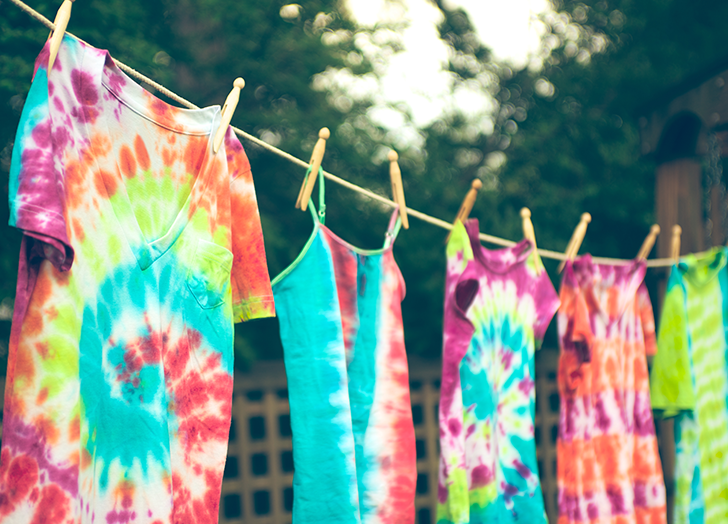
7. Throw A Tie-dye Party
Throw a tie-dye party with your friends or kids to give new life to everyone’s lackluster tops. You can even make your own natural dyes that are safe for little hands by using colorful vegetables or plants. Below is a base recipe to follow; you can swap in different raw ingredients to get the colors you’re looking for.
What you’ll need:
- Gloves
- Vegetables or plants for color (beets for red, spinach for green, turmeric for yellow, etc.)
- Knife
- Water
- Cheesecloth
- Strainer
- Large bowl
- Salt
- Funnel
- Condiment bottles
- Rubber bands
- T-shirts
- White wine vinegar
To make the dye:
Step 1: Put on the gloves and finely chop any solid ingredients (like carrots or red cabbage). Place in a blender with 1 cup of very hot water for every 1 cup of veggies. If you’re using a powder to add color, like turmeric, use 1 to 2 tablespoons for every 2 cups of water.
Step 2: Blend the mixture until it becomes very fine.
Step 3: Strain the mixture through cheesecloth into a large bowl.
Step 4: Dissolve 1 tablespoon salt salt into the dye.
Step 5: Use a funnel to pour the dye into the condiment bottles (one bottle for each color).
To tie-dye your tees:
Step 1: Use rubber bands to create your tie-dye design by bunching, twisting and folding the fabric. If you’re hoping to make a particular pattern, like a classic circle or ombré stripes, you can use this handy list of different twisting techniques from blogger By Stephanie Lynn.
Step 2: Add ½ cup salt and 2 cups white wine vinegar to 8 cups water and bring to a boil.
Step 3: Simmer the T-shirts in the vinegar solution for 1 hour before you plan to dye them.
Step 4: After an hour, run the shirts under cool water without removing the rubber bands; wring out any excess water. They should be damp but not dripping.
Step 5: Wearing gloves, squirt the dyes directly onto the T-shirts.
Step 6: One you’re done creating your unique pattern and dye job, allow the shirts to dry completely overnight.
Step 7: Remove the rubber bands and run your tees through the dryer to further set the dye.
One thing to note: If you do use vegetable dyes, plan to hand-wash your new tie-dyes as the colors may not last through tough detergents or washing machine cycles.
Hallie Bear/Getty Images
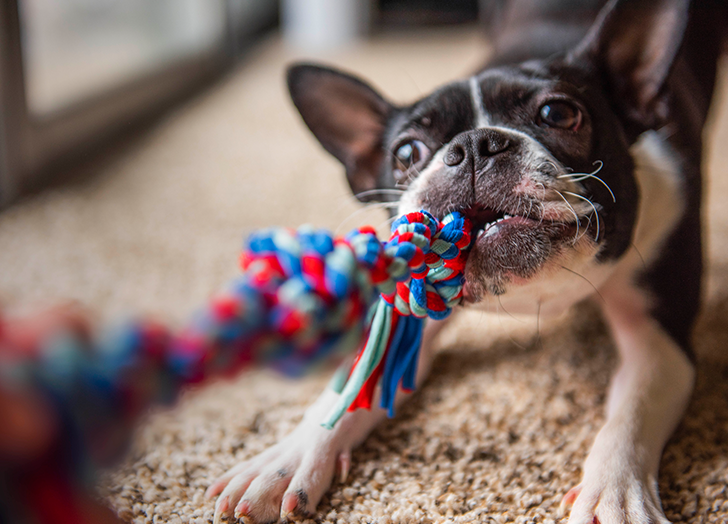
8. Make A Personalized Dog Toy
Give Fido a homemade, eco-friendly toy that already smells like his favorite human. Now, even if (by which we mean when) he destroys it, you can just whip up another toy, no trip to Petco required. There are many different tutorials online to guide you through making a variety of different dog-toy styles, but our favorite is also probably one of the simplest: a chunky braid with two knots. Here’s how to make one for yourself:
Step 1: Lay an old T-shirt flat and cut along the side seams to separate the front from the back. You can leave the sleeves attached to make your strips longer or separate them and make some shorter strips for tying the ends (or use them as garden or hair ties, as described above).
Step 2: Start cutting three-inch slits at the bottom that are roughly two to three inches wide.
Step 3: You should be able to rip the strips the rest of the way, but if the fabric is being stubborn, just keep cutting until you have a handful of long strips to work with.
Step 4: Gather the strips and tie one large basic knot.
Step 5: Separate the strips into three equal sections and braid until you have about three inches remaining, then tie off the end with another knot. Now you’re ready to spend the afternoon playing with your pup.
Feel free to use multiple T-shirts to create a more colorful or thicker toy.
MommyPotamu
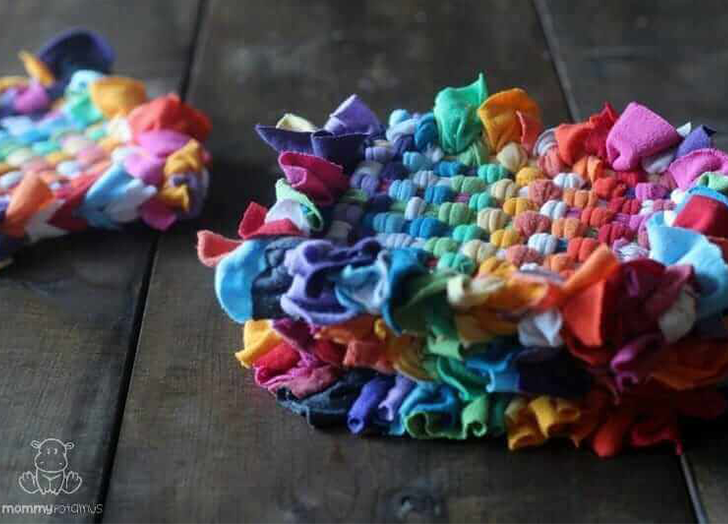
9. Make A Potholder
One crafty step up from the DIY dog toy is the DIY potholder. This colorful creation would make an excellent housewarming gift or stocking stuffer for friends. Or, you know, keep it for yourself. Either way, this tutorial from MommyPotamus is quite easy to follow, as long as you can get your hands on a loom and hook from a craft store. (For reference, one medium or large T-shirt is needed to make each potholder.)
One Dog Woof
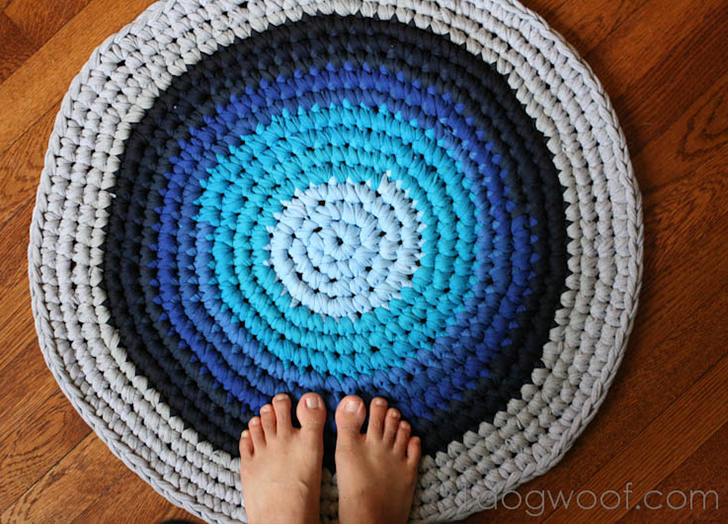
10. Make A Throw Rug
If you are a fan of crochet or are feeling particularly ambitious, this T-shirt rug is a super-cozy idea that will give your tees a whole new lease on life and works especially well if you have multiple colors or patterns to work with. The blog One Dog Woof has an excellent tutorial video to show you just how it’s done.
Jamie Grill/Getty Images
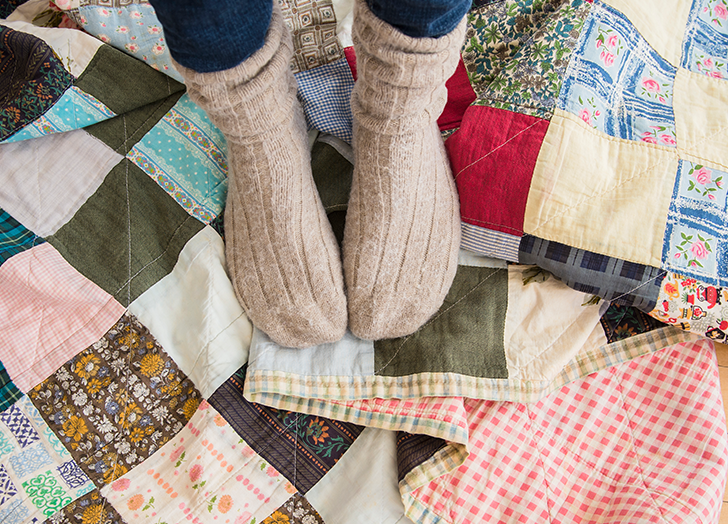
11. Turn Them Into A Quilt
One major reason we find it so hard to part with our beloved tees is because the well-worn cotton is just so damn soft. Stitching together a quilt made from all those vintage tees is a great way to keep that comfy vibe going. If you aren’t a crafty person or just don’t have the patience to put a quilt together, you can ship your tees off to someone who will do all the work for you, like Memory Stitch or American Quilt Co. Up for the challenge? Here’s a beginner’s guide from Baby Lock on how to create your own T-shirt quilt.